 Save
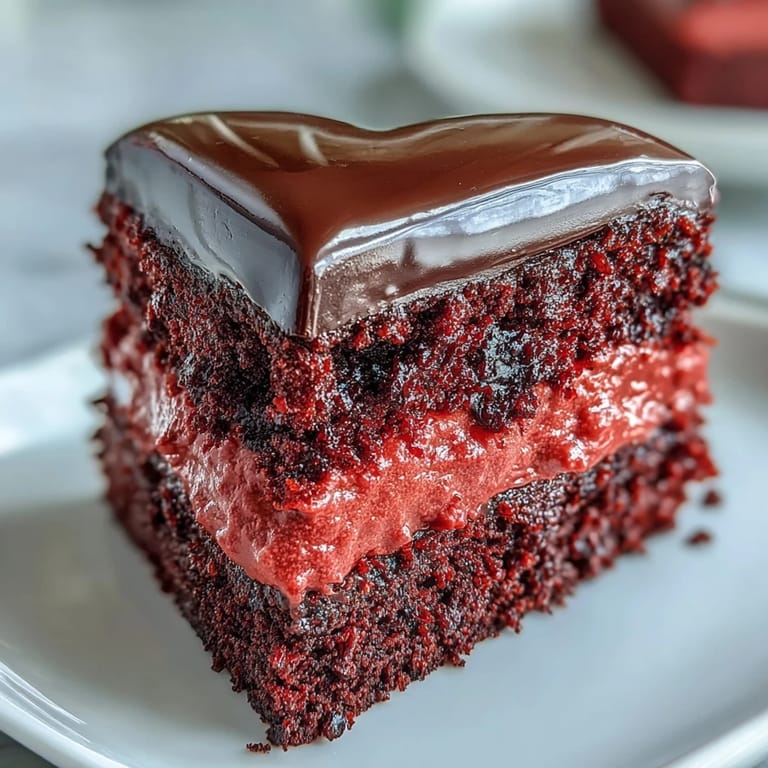
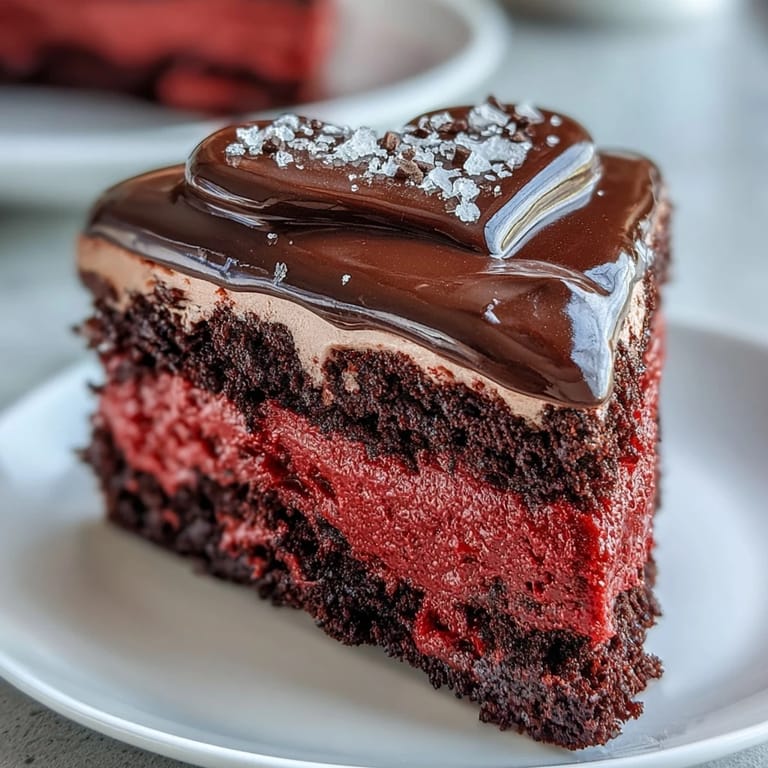
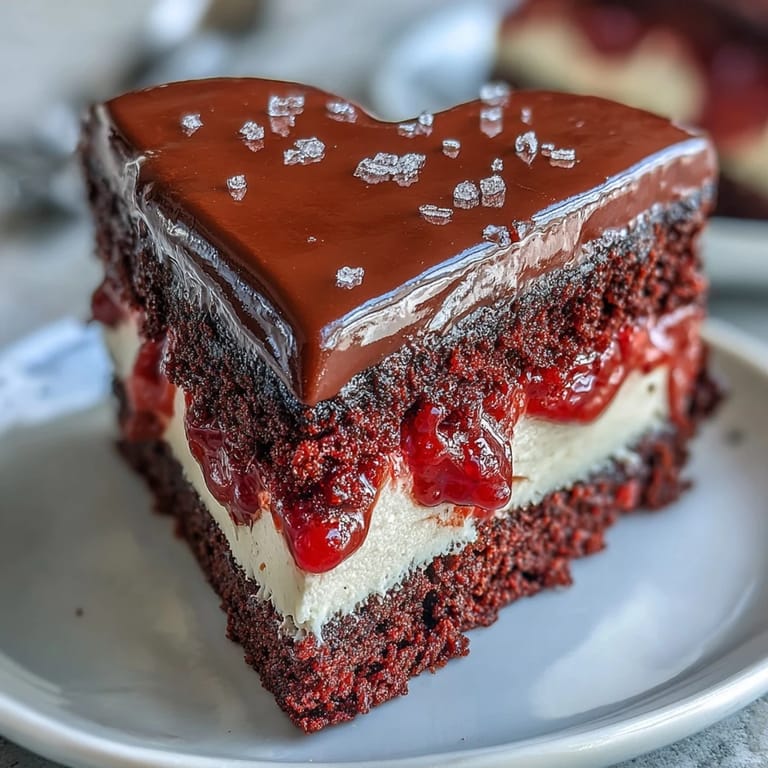
Save Last Valentine's Day, I decided to channel some retro glamour into the kitchen with this showstopper. There's something undeniably charming about that playful Betty Boop silhouette against the dramatic red cake—it makes everyone smile before they even take a bite. The cake itself took three attempts to perfect, but that first successful slice made all the red-stained countertops worth it.
My sister-in-law asked for this for her birthday instead of a traditional layer cake, and seeing her face light up when I brought it out was one of those kitchen moments that stick with you. We spent the whole dinner making terrible Betty Boop impressions between forkfuls.
Ingredients
- Cake flour (312g): This lower-protein flour creates that signature tender velvet crumb, and sifting it first prevents any frustrating clumps in your batter
- Natural cocoa powder: Just enough to deepen the red color without overpowering that classic velvet flavor profile
- Room temperature butter and eggs: I learned the hard way that cold ingredients create a lumpy batter, so set everything out an hour before you start
- Red gel food coloring: Gel delivers that intense Hollywood red without thinning your batter like liquid colors do
- Buttermilk: This reacts with the vinegar to activate the baking soda, giving you those beautiful tender crumbs
- Cream cheese: Full-fat brick cream cheese makes the silkiest frosting—avoid the tub stuff which contains stabilizers that affect texture
- Dark chocolate or candy melts: The snap of dark chocolate against soft cake is pure magic, and it holds the silhouette shape beautifully
Tired of Takeout? 🥡
Get 10 meals you can make faster than delivery arrives. Seriously.
One email. No spam. Unsubscribe anytime.
Instructions
- Preheat and prep your pans:
- Set your oven to 350°F and generously grease two 9-inch heart-shaped pans with butter, then line the bottoms with parchment circles cut to fit
- Whisk the dry ingredients:
- In a medium bowl, combine sifted cake flour, cocoa powder, baking powder, baking soda, and salt until everything is evenly distributed
- Cream the butter and sugar:
- Beat the butter for 1 minute until creamy, then gradually add sugar and continue whipping for 2-3 minutes until the mixture looks pale and fluffy
- Add the eggs one by one:
- Drop in each egg individually, beating just until blended after each addition, and scrape down the bowl to ensure everything incorporates evenly
- Create that signature red color:
- Pour in the red gel coloring, vanilla extract, and white vinegar, then mix until your batter transforms into that stunning uniform crimson
- Alternate wet and dry ingredients:
- With the mixer on low, add one-third of the dry ingredients followed by half the buttermilk, repeating until everything is just combined
- Activate the lift:
- Stir vinegar into baking soda in a small cup until it foams, then gently fold through the batter for extra tenderness
- Bake until perfectly set:
- Divide batter between your prepared pans, smooth the tops, and bake for 25-30 minutes until a toothpick comes out clean
- Cool completely:
- Let the cakes rest in pans for 10 minutes before turning them onto wire racks, and resist the urge to frost while still warm
- Make the silkiest frosting:
- Beat room temperature cream cheese and butter for 2 minutes until smooth, then gradually incorporate powdered sugar and vanilla until fluffy
- Assemble like a pro:
- Level any domes with a serrated knife, layer cakes with frosting between, apply a thin crumb coat, and chill 10 minutes before the final layer
- Create the chocolate silhouette:
- Place your Betty Boop stencil under parchment paper, then carefully trace the outline with melted dark chocolate and let set completely
- Final dramatic touch:
- Gently peel the chocolate silhouette from parchment and position it on your frosted cake, adding any extra decorations around the edges
 Save
Save This cake has become my go-to for whenever someone needs a little extra cheer, and watching friends carefully peel off their chocolate silhouette piece to eat separately has become a weirdly beloved ritual.
Making Ahead And Storage
You can bake the cake layers up to two days in advance, wrap them tightly in plastic, and store at room temperature. The frosting actually tastes better after chilling overnight, so feel free to make it ahead and bring it to room temperature before using.
Getting That Silhouette Just Right
Print your Betty Boop stencil at the exact size you want, then tape it under your parchment paper on a flat surface. Use a piping bag or small brush with melted chocolate—work slowly and let the chocolate set completely at room temperature before attempting to move it.
Serving And Presentation Tips
Chill the finished cake for at least 30 minutes before slicing to get those clean, picture-perfect hearts. Run your knife under hot water and wipe it dry between each slice for the smoothest cuts.
- Use a warm, dry knife for each slice to prevent dragging the frosting
- Let slices sit at room temperature for 10 minutes before serving for the best texture
- Any leftover cake keeps beautifully refrigerated for up to 4 days
 Save
Save There's pure joy in slicing into that dramatic red cake and watching everyone's faces light up, making all the steps completely worthwhile.
Recipe FAQ
- → Why use gel food coloring for the cake?
Gel food coloring is recommended because it provides the most vibrant red hue without significantly altering the consistency of the cake batter. This ensures your crumb remains soft and tender while achieving a beautiful color.
- → What's the secret to a smooth frosting finish?
For an exceptionally smooth finish on your cream cheese frosting, gently heat your offset spatula under hot water, wipe it completely dry, and then use it to smooth the frosting. This technique helps melt the surface slightly, creating a silky appearance.
- → How long can this cake be stored, and how?
This cake, once baked and frosted, can be stored covered in the refrigerator for up to 4 days. Ensure it's well-sealed to prevent it from drying out and absorbing other fridge odors.
- → Can I use a different type of chocolate for the silhouette?
Absolutely! While dark chocolate is specified, you can swap it for white chocolate. If using white chocolate, you can dye it black with oil-based food coloring for a striking contrast, or use a different color to match your theme.
- → What makes the cake crumb so light and tender?
The light and tender crumb is achieved by combining baking soda with white vinegar just before incorporating it into the batter. This creates a chemical reaction that produces carbon dioxide bubbles, resulting in a beautifully airy and soft texture.